Have you ever looked closely at a flower petal or the intricate patterns on an insect’s wings and wished you could see them even closer? Macro photography opens up a hidden world, revealing details the naked eye often misses. For many photographers, the high cost of a dedicated macro lens can be a major barrier. This is where the Raynox DCR-250 comes in, offering a powerful and affordable gateway into the world of extreme close-ups.
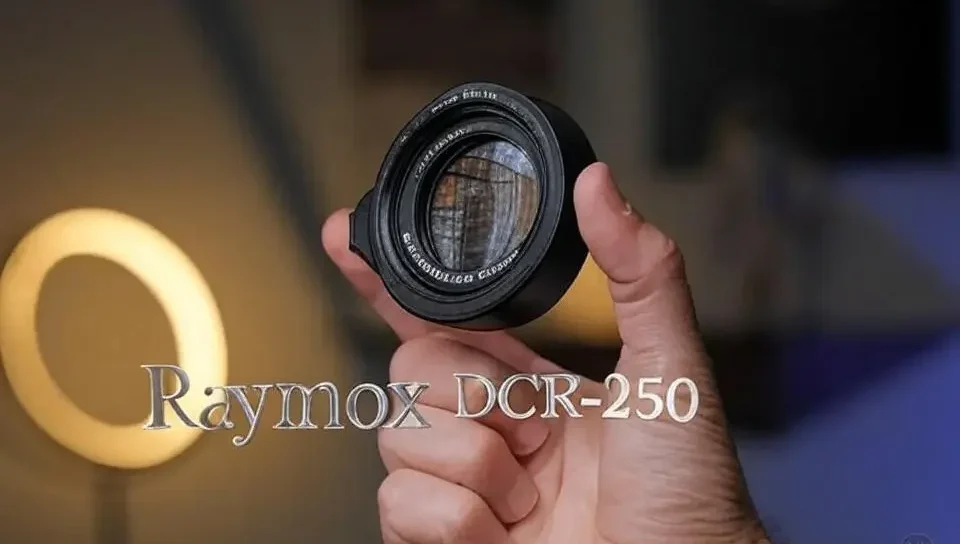
The Raynox DCR-250 is a super macro conversion lens. It’s not a standalone lens but rather an accessory you attach to your existing camera lens. This clever piece of gear dramatically increases your lens’s magnification power, allowing you to capture stunningly detailed images of tiny subjects. It’s a favorite among both beginners and seasoned photographers for its impressive performance, ease of use, and budget-friendly price. This article will explore everything you need to know about this fantastic tool, from what it is to how to get the best results with it.
Table of Contents
Key Takeaways
- Affordable Macro Solution: The Raynox DCR-250 provides excellent macro capabilities without the expense of a dedicated macro lens.
- High Magnification: It offers a powerful +8 diopter magnification, perfect for capturing extreme close-ups of insects, flowers, and other small subjects.
- Universal Compatibility: Its unique snap-on adapter fits lenses with filter threads from 52mm to 67mm, making it compatible with a wide range of camera lenses.
- Requires Practice: The high magnification results in a very shallow depth of field, which can be challenging but rewarding to master.
What Exactly is the Raynox DCR-250?
The Raynox DCR-250 is a type of lens known as a diopter or close-up filter. Think of it as a powerful magnifying glass that you clip onto the front of your camera’s lens. Its main job is to shorten the minimum focusing distance of your lens, which is the closest you can get to a subject while keeping it in focus. By doing this, it drastically increases the magnification.
The lens itself is made of high-quality optical glass, designed to produce sharp and clear images. It consists of three glass elements arranged in two groups, which helps reduce issues like chromatic aberration (color fringing) that can sometimes occur with simpler close-up filters.
One of its most praised features is the universal snap-on mount. This spring-loaded adapter makes it incredibly easy to attach and detach the Raynox DCR-250 macro lens from your camera. It’s designed to fit lenses with filter thread sizes ranging from 52mm to 67mm. If your lens has a different thread size, you can easily use affordable step-up or step-down rings to make it fit.
Unboxing Your New Macro Tool
When you purchase a Raynox DCR-250, you get more than just the lens. The package is designed to get you started right away. Here’s what you can expect to find inside the box:
- The Raynox DCR-250 Lens: The main +8 diopter conversion lens itself.
- Universal Snap-On Adapter: The versatile mount for 52mm-67mm filter threads.
- Front and Rear Lens Caps: To protect the glass when not in use.
- Carrying Case: A convenient plastic box to keep everything safe and organized.
This complete kit ensures you have everything needed to protect your investment and take it with you on your photographic adventures.
Key Specifications of the Raynox DCR-250
Understanding the technical details can help you get the most out of your gear. While the Raynox DCR-250 is simple to use, its specifications reveal why it’s so effective.
| Specification | Detail |
|---|---|
| Magnification | +8 Diopter |
| Lens Construction | 2 groups, 3 elements |
| Glass Type | High-index coated optical glass |
| Front Filter Thread | 49mm |
| Mounting Thread | 43mm (on the lens itself) |
| Adapter Compatibility | 52mm to 67mm (with included snap-on mount) |
| Dimensions | 18mm x 53mm |
| Weight | 60g (2.1oz) |
The +8 diopter rating is what gives this lens its “super macro” power. It’s significantly stronger than its sibling, the DCR-150 (+4.8 diopter), making the DCR-250 ideal for those who want to get extremely close to their subjects.
Finding the Best Lens for Raynox DCR-250
A common question is, “What is the best lens for Raynox DCR-250?” The truth is, it works well with many different lenses, but telephoto lenses are generally the best choice. This is because the Raynox achieves its highest magnification when the host lens is zoomed in.
Telephoto Zoom Lenses
Using the Raynox DCR-250 on a telephoto zoom lens (like a 55-200mm or 70-300mm) is a popular combination. It allows you to adjust the level of magnification by simply zooming your lens. Setting your lens to its longest focal length (e.g., 200mm) will give you the most powerful macro effect. This setup provides great flexibility and a comfortable working distance from your subject.
Prime Lenses
Prime lenses, especially those with focal lengths of 85mm, 100mm, or longer, are also excellent partners for the DCR-250. These lenses are often very sharp, and combining them with the Raynox can produce outstanding image quality. You will have a fixed magnification, but the results can be incredibly detailed.
Dedicated Macro Lenses
You can even attach the Raynox DCR-250 to an existing 1:1 macro lens. This pushes the magnification beyond what the macro lens can do alone, turning it into a super macro setup capable of achieving greater than 1:1 life-size reproduction. This is a great option for experienced macro photographers looking to get even closer.
Getting Started: How to Use Your Raynox DCR-250
Using the bonnette macro Raynox DCR-250, as it is sometimes called in French-speaking regions, is straightforward, but mastering it takes some practice.
- Attach the Lens: Squeeze the two buttons on the snap-on adapter and clip it securely onto the front of your camera lens. Make sure it’s snug.
- Set Your Focal Length: If using a zoom lens, set it to its longest focal length (e.g., 100mm or more) for maximum magnification.
- Switch to Manual Focus: Autofocus will struggle significantly with the extremely shallow depth of field. Switch your lens and camera to manual focus for better control.
- Find Your Focus: Instead of using the focus ring, the easiest way to focus is to physically move your camera back and forth. Gently rock your body until the part of the subject you want in focus becomes sharp in the viewfinder or on the LCD screen.
- Control Your Aperture: Use a narrow aperture (a higher f-number like f/8, f/11, or f/16) to increase the depth of field. This will help get more of your subject in focus.
Tips and Tricks for Stunning Macro Photos
The Raynox DCR-250 macro lens has a steep learning curve due to its powerful magnification. Here are some tips to help you overcome the challenges and start taking incredible shots.
Embrace Manual Focus
As mentioned, autofocus is not your friend here. The depth of field is so thin—often just a few millimeters—that the camera’s autofocus system will constantly hunt and fail to lock on. Set your focus ring to its minimum distance and then use the “rocking method” by moving your body to nail the focus. It feels awkward at first but quickly becomes second nature.
Use a Tripod and Remote Shutter
For stationary subjects like flowers or water droplets, a sturdy tripod is invaluable. It eliminates camera shake, which is magnified at high magnifications. Using a remote shutter release or your camera’s self-timer will further prevent any vibrations from blurring your shot when you press the shutter button.
Add More Light
Using narrow apertures like f/11 or f/16 means less light reaches your camera’s sensor. To compensate, you’ll need to either slow down your shutter speed or increase your ISO. For handheld shooting, a faster shutter speed is necessary to avoid motion blur. Don’t be afraid to bump up the ISO; modern cameras handle noise much better than older models. Alternatively, using a flash (especially a ring flash or twin-lite flash) or another external light source is a great way to illuminate your subject properly.
Try Focus Stacking
Because the depth of field is so shallow, it’s often impossible to get an entire subject in focus in a single shot. Focus stacking is a technique where you take multiple photos of the same subject, each focused on a slightly different spot. You then merge these images together in post-processing software (like Adobe Photoshop or Helicon Focus) to create one final image that is sharp from front to back.
Is the Raynox DCR-250 Right for You?
The Raynox DCR-250 is a fantastic tool, but it’s not for everyone. If you’re looking for an easy, point-and-shoot macro experience, you might find it frustrating. The challenges of a paper-thin depth of field and the need for manual focus require patience and practice.
However, if you are a photographer on a budget who wants to explore the world of extreme macro, it’s one of the best investments you can make. It provides image quality that rivals much more expensive setups. It’s also perfect for experienced photographers who want a lightweight, portable option to add super macro capabilities to their existing gear without carrying another heavy lens.
Pros:
- Excellent magnification power (+8 diopter)
- Great image quality with sharp results
- Very affordable compared to dedicated macro lenses
- Lightweight and portable
- Universal adapter fits a wide range of lenses
Cons:
- Extremely shallow depth of field is challenging
- Autofocus is practically unusable
- Works best with telephoto focal lengths
- Flimsy lens caps
Conclusion: A Small Lens with Big Potential
The Raynox DCR-250 proves that you don’t need to spend a fortune to capture the unseen world around you. This small, unassuming accessory transforms your standard telephoto or prime lens into a powerful macro instrument. While it demands practice to master its shallow depth of field and manual focusing technique, the results are well worth the effort.
For anyone curious about macro photography or looking to push their current gear to new limits, the Raynox DCR-250 macro lens is an exceptional choice. It’s an invitation to slow down, look closer, and discover the incredible beauty hidden in the smallest details. So go ahead, clip it on, and start exploring.
Frequently Asked Questions (FAQ)
1. Can I use the Raynox DCR-250 with my kit lens?
Yes, you can use it with a standard kit lens (like an 18-55mm), but it works best when the lens is zoomed to its longest focal length (55mm). For better results, a telephoto lens with a longer focal length is recommended.
2. What is the difference between the Raynox DCR-150 and DCR-250?
The main difference is the magnification power. The DCR-150 has a +4.8 diopter, while the Raynox DCR-250 has a stronger +8 diopter. The DCR-250 provides more magnification but also has a shallower depth of field, making it more challenging to use. The DCR-150 is often considered more beginner-friendly.
3. Does the Raynox DCR-250 reduce image quality?
No. The DCR-250 is made from high-index optical glass and is known for maintaining excellent image sharpness and clarity. Unlike cheap, single-element filters, it does a great job of controlling chromatic aberration and other distortions.
4. My lens filter thread is not between 52mm and 67mm. Can I still use it?
Yes. You can buy inexpensive step-up or step-down adapter rings. For example, if your lens has a 49mm thread, you would buy a 49mm to 52mm step-up ring to attach the Raynox adapter. The DCR-250 lens itself also has a 43mm thread, so it can be screwed directly onto lenses with a 43mm filter thread.
Leave a Reply